Title here
Summary here
June 12, 2024 in guide4 minutes
A guide to install BTT Eddy on a stock K1 (Max) with Guppy Creality K1 Mod
This guide uses Guppy Creality K1 Mod as the basis for setting up the BTT Eddy. Please read the docs on the project page to get an understanding of the install and risks associated with it.
Danger
You might damage your printer. Proceed at your own risk.
Note
bed_mesh setting has only been tested on a K1. The mod contains printer.cfg for other K1 variants (K1C/K1 Max). Make sure to adjust the bed_mesh mesh_min mesh_max accordingly.sh -c "$(wget --no-check-certificate -qO - https://raw.githubusercontent.com/ballaswag/creality_k1_klipper_mod/master/install.sh)"Tail end of your output should look like the following. Make sure the exit codes are 0.
+ cp /usr/data/.klipper_mod/chroot/etc/init/S00klipper_mod /etc/init.d/
+ sync
+ exit 0
+ '[' 0 -eq 0 ]
+ exit 0System to see your new IP address.root, password guppy.BOOT button on your BTT Eddy, plug it into your K1 (front USB port is fine).rp2040_flash /root/firmwares/btt-eddy.uf2Guppy Mod username is root and password is guppy
You should see output like this
K1 ~ > rp2040_flash /root/firmwares/btt-eddy.uf2
Loaded UF2 image with 136 pages
Found rp2040 device on USB bus 1 address 5
Flashing...
Resetting interface
Locking
Exiting XIP mode
Erasing
Flashing
Rebooting device
Your BTT Eddy is now flashed with the appropriate firmware.
Z Position
The following procedure will require you to position the nozzle about ~20mm from the bed. position_min on [stepper z] can prevent this from happening if your bed is way off from 20mm.
When doing z offset, you might also hit out of range errors if the position_min is hit before you’re calibrated. Workaround is to increase the z range by changing position_min under [stepper_z], or move until Z throws out of range error, restart Klipper then move bed closer to nozzle some more.
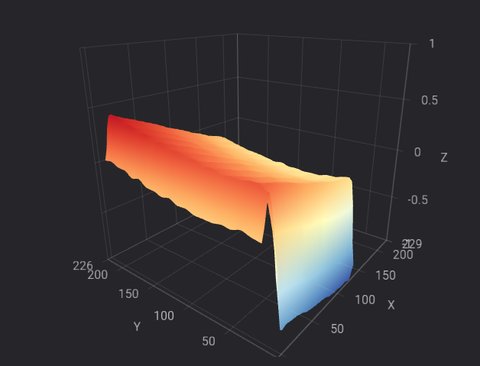
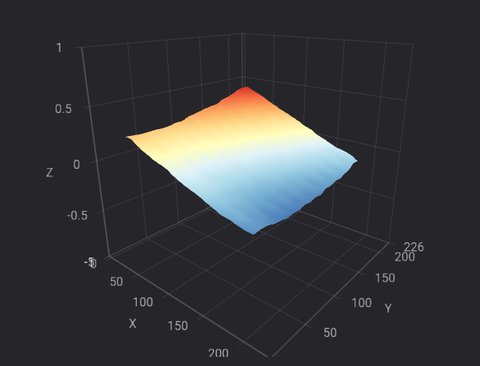
G28 X Y (Home X Y)G90 (absolute position)G0 X125 Y125 F6000 (Center Nozzle)LDC_CALIBRATE_DRIVE_CURRENT CHIP=btt_eddySAVE_CONFIGG28 X Y (Home X Y)G90 (absolute position)G0 X125 Y125 F6000 (Center Nozzle)PROBE_EDDY_CURRENT_CALIBRATE CHIP=btt_eddy (Triggers manual z offset calibration - paper test)SAVE_CONFIGG28 (Home All)BED_MESH_CALIBRATE METHOD=rapid_scan (Test mesh)Bed Mesh Cliffs
Validate your mesh in fluidd/mainsail. If you see cliffs on your X/Y boundaries, you’ll need to edit [bed_mesh] mesh_min and mesh_max until yo no longer see those cliffs. Failure to due so might cause your nozzle to run into your bed.
At this point, the basic setup is done and you should be able to home and mesh. Currently temperature compensation calibration is not supported in mainline Klipper used by the Guppy Mod.
mesh_min and mesh_max and try again.sensor errors, you might need to redo LDC_CALIBRATE_DRIVE_CURRENT CHIP=btt_eddy with a different Eddy to Bed distance, or try a different reg_drive_current value in your printer.cfg.